Monday, December 21, 2009

My Chili Lime Shrimp Recipe

With a bit of reluctance, I am sharing my famous shrimp recipe. It was going to be in my cookbook, but it's become a fan favorite and so many people have asked me for it.

I am only reluctant because now that a lot of people will have the recipe, I'll have to come up with another signature Carla dish to bring to parties. They won't need me to bring it anymore. :)

Okay, so with all of that said, and without further ado, here is the recipe.


25-35 bag large shrimp, deveined, uncooked and peeled (note: it's hard to find uncooked peeled shrimp sometimes, so purchasing a bag of uncooked un-peeled will do. just more work to peel the shrimp)
2 tbsp finely minced garlic
1/4 c butter
1 tbsp crushed dried chili flakes (more or less depending on the heat you like)
Zest of one whole lime
Juice of whole lime
Juice of half a lemon
Approx. 1/4 cup of fresh chopped Cilantro
1 Large French Baguette
Various Cream Cheese Flavours (herb and garlic, chives, onion and garlic or plain)

In a large hot skillet, combine garlic and butter until combined and the smell of garlic fills your kitchen. (the best part...YUM!!)
Add the peeled shrimp, and chili flakes. Combine
Add the lime zest, lime juice and lemon juice and cook until the shrimp are no longer pink. May take up to 6 mins. (check the shrimp, do not over cook) As soon as they are all no longer pink, they are done.
Remove from heat and stir in chopped fresh Cilantro

Cut french baguette in 1 inch slices on an angle. (I like to make crostini out of the baguette. Take sliced baguette, brush with a little olive oil on both sides, place on baking sheet and bake in a 375 degree oven until lightly brown)

Take fresh baguette slices or crostini, spread desired cream cheese flavour and top with two shrimp. Make sure to drizzle some of the delicious juice from the pan over the shrimp and crostini.

Then...fall in love with this appetizer as you bite into it and the flavours explode in your mouth!!!

Quick and easy appetizer great for the sharing with family and friends over the holidays. They will fall in love with your cooking skills with this one. I promise!!!!

We love it so much, we don't only have it for special occasions.

Other ideas for serving the shrimp, other than on crostini:

-make the shrimp following recipe, and toss or serve on top of your favorite pasta
-serve over a spanish or plain rice
-serve just as is as a side dish to any choice of protein (chicken, pork, beef, lamb)
-let the shrimp slightly cool, and top a green salad
-toss in couscous or orzo
-before cooking the shrimp, let marinade in the melted butter, garlic, chili flakes, and lime zest. Skewer alternating with mushrooms, protein and place on the grill. Finish it off by combining the lime juice, lemon juice and cilantro, and drizzling it over the finished skewers as they come off the grill. (delicious)

So many things to do with this wonderful dish. Have fun experimenting!!! The ideas are endless.

Until we cook again :)

Wednesday, December 16, 2009

Butter


Ingredient of the Day: BUTTER

How many of us like butter? Come on. Let's be totally honest. Butter is so good. We can cook with it, bake with it, and finish things off with it, and let's not forget spreading it over some fresh out of the oven buns. DELARSHIOUS!!!! (i know...not a real word, but it is in my book) Moving on...and back to the topic at hand BUTTER.

I am going to be honest and say that I try really hard not to add a ton of fat into my recipes, but there are certain things substituting margarine or low fat for butter, well...it just doesn't cut it.

Since Christmas is just around the corner, and baking is at an all time high, and all kinds of veggies will be gracing many dinner tables, I thought it would be fitting to post about this deliciously, very obviously fattening, yet so tempting lovely pale of yellow yumminess.


That brings me to COMPOUND BUTTER.
What is compound butter? To put it plainly, it is plain ole butter, softened (not melted) that is fancied up by putting varying ingredients into it. Mixing it up, and then placing back into the refrigerator to set up again. When I make my compound butters, I like to roll them up into cylinder shapes making it easier to cut and serve on top of a warm steak, veggies, or to finish of a sauce. The varying ingredients are and can be endless.
Some examples: Lemon/Lime Zest, any herb of your liking, chili flakes, garlic, pepper, cinnamon, brown sugar, sea salts, and any spice blends you can dream of. Making the butter savoury or sweet.


Now let's take a simple vegetable side dish. One that will more than likely be at more than a handful of tables this holiday season.
CORN. Corn is one of those vegetables that tastes great with butter, salt and pepper, but is even better when you COMPOUND BUTTER it UP!!!!
I came up with this recipe last summer. It was a hit. Since then, I've served it many different places and have had rave reviews on it, so since I am in the giving spirit....(thanks to Christmas) I thought I would share it with my faithful blog followers.
So simple...yet everyone will wonder what you did with the old staple stand by side dish of corn. Here's the facelift.

Lime Compound Butter

1 lb butter (softened at room temperature and placed in a small mixing bowl)
Zest of 3 Limes
Juice of 1 1/2 limes
Sea Salt to taste
Cracked Pepper to taste
1/4 tsp garlic or less if you wish


Place all ingredients in the bowl with softened butter and mix well. Take a good size piece of cling wrap or wax paper and place the mixed butter in the center of the paper. Using one of the outer edges of the paper, form the butter into a log and roll. Store in the refrigerator until ready for use.


Corn:

Corn Cobs, Kernals, Fresh or Frozen. Once your corn has been cooked, take desired amount of lime compound butter and mix into warm corn. Serve and Enjoy!!!!


You can do so much with compound butter. Try it next time a vegetable, meat dish, or dinner roll could use a little pick me up or facelift. Take some of your favourite flavours and create your own compound butter. You'll be surprised with the results and how little effort it takes to transform a simple dish.

Until we cook again :)

Thursday, November 19, 2009

Tomato Base for the Freezer

A while back I promised I'd post the recipe for my tomato base that keeps in the freezer really well and one I use often.

This is a very rough recipe because I often cook without a recipe. Hopefully it makes sense. Just trust your taste buds as you combine.

When ever a recipe calls for tomatoes, I often like to use Roma or Plum tomatoes. I find they are meatier. Now keep in mind that I do this recipe in a huge amount. But it is very easy to cut down.

Approx. 20-25lbs Roma Tomatoes (seeded) and chopped (leave the skins on)
Garlic Head (peeled and chopped)
2 large White Onions finely chopped
1/4 cup dried basil
1/3 cup dried oregano
Olive Oil
Salt and Pepper to taste

Tip: the measurements on the dried herbs are very rough. that is approx. what i used. you can use more of one and less than the other, depending on the flavor you prefer.

Saute the onions and garlic in a pot with some olive oil. Once they are soft and transparent, add your chopped and seeded roma tomatoes. Note: you may have to do this in a few stages to fit all the tomatoes depending on the size of your pot. Add the dried oregano, basil, salt, pepper, and stir to combine. Simmer until tomatoes are soft and broken down, stirring often. At this point remove from stove and take a hand blender and blend everything together to a thick consistency. Place back on the stove and simmer until desired thickness of sauce has been reached. I usually simmer it down by about half. Stir often.

Remove from heat. Let cool, and then place in freezer bags, or freezer containers. When I use the freezer bags, I make sure to lay them flat in the freezer. Makes it easier to store bags on top of each other making more room.

Freezer for up to 3 months.

I use it as a tomatoe sauce for pasta, a tomatoe base for soups or chowders, just as a sauce over c chicken, pork and seafood, and even as a marinade in some cases.

The possiblities are endless. It really doesn't take a lot of time, but can save you time when you need a quick base for your meal.

Try adding different herbs and even chili flakes to change the background flavor when cooking.

Hope this will come in handy in your kitchen. It's a must in mine.

Until we cook again :)


Tuesday, November 10, 2009

My Kitchen Must Have's Part 1

Whenever I cater, or have a dinner party, often I am asked what are "my kitchen essentials". You know those simple tools, that don't cost a fortune, but make a huge difference in my kitchen and prep time.

So I decided to do a little write up (Part 1) on the few things I couldn't live without in preparing any dish. Whether it's for hundreds, smaller groups or my family and friends, these are "those things" I use on a regular basis.


Mini Spatulas


I love using these little guys. I find they are perfect for stirring small quantities of sauces, mixtures, scraping measuring cups and even measuring spoons out, and well...pretty much anything that is "small". Now if only I could keep them away from little hands and keep them in my gadget drawer long enough...I would literally use them every single day. They make the best stocking stuffers for anyone who enjoys cooking or baking.


Mini Whisks


Another one of those must have's. I use these about as much as my mini spatula's or come to think of it...maybe even more. I am big on making my own marinades, basting sauces etc especially when it comes to BBQin'. These mini whisks come in handy for mixing in smaller bowls. Another great stocking stuffer for Christmas and they won't break the bank. Quite often you can find them in a set of two just like in the picture.


Mini Prep Bowls w/Lids


I love love love these bowls. Not only am I fascinated by all things mini right now...I've always liked using prep bowls when I am gathering my ingredients. These particular ones are the Pampered Chef Prep bowls that come in a set of six w/lids. I tend to like these the best. I like that they have measures on them. Each bowl holds one cup, with a 1/2 cup and 3/4 cup measure on it too. When I zest, mince, chop, slice, or measure liquids in smaller amounts, these come in very handy. Ready to place all needed ingredients in order into my recipe. Keeps things neat and organized while cooking. Again...nothing that will break the bank but essential in my cooking kitchen!


Garlic Press


Speaking of mincing into my cute little prep bowls...another staple. Not only have I always loved using garlic, I love it that much more now that I have added this kitchen must have. I've actually been using it for years. As a matter of fact, I have about 3 of them. I love them that much. For all you garlic lovers, who don't like to peel those pesky little cloves and try finely mincing it with a knife, this gadget is for you. NO NEED TO PEEL!!! Place the whole garlic clove into the press, press and it comes out ready and finely minced! I've only ever used the Pampered Chef Garlic Press. Probably because at one point I used to sell it. That's not the only reason I love using it. It really is that good. Try it! :) You'll end of loving it too and before long it will become a staple in your kitchen if it hasn't already.


Microplane (Fine Zester)


I am big into adding freshly grated zest of any kind of citrus to many of my dishes and sauces. It really adds to the flavor. You can spend lots of money on a really good one, but honestly, I've gone through a few myself and have found that they all do a pretty good job. The microplane is easy to use. Zest directly into your dishes. Remember when zesting anything, to only use the colored rind. Never use the white flesh of the peel as it is bitter and will add bitterness to your dish or sauce.


Mortar & Pestle


Because I am big into preparing most of my own sauce, spices, etc, I find I can not live without this piece of added heaven in my kitchen. As a matter of fact...I collect them because I find them so beautiful. There is nothing better then throwing a few peeled cloves of garlic, some fresh herbs, a little olive oil and course salt to make your own herb spread for the best topping on crostini. So simple...yet so mouth watering, it's unbelievable. Even more than that, once you start to combine things together in your mortar, the aroma and fresh pungency of what you are creating will have you hooked forever. There really isn't anything like it!!


There you have it. Some of my favorite kitchen must have's. All serve a different purpose. All beautiful in their own right because of that purpose. Especially when so many ingredients serve as your pallet in creating your very own masterpiece in the kitchen. It's nice to have some of those little extra's that help you enjoy what you create that much more!

Until we cook again!

Stay tuned for My Kitchen Must Have's Part 2 where I'll talk specifically about knives. A must in any kitchen :)


Sunday, November 8, 2009

Rustic Tomato Tart with Roasted Veggies

Roasted Baby Veggies

Remember those cute little mini veggies from one of my last posts. Well..this is what I decided to do with them.

I took them all, the baby purple artichokes, baby zucchini and squash, & the purple carrots, cut them all in half lengthwise and placed them on a cookie sheet sprayed with some vegetable spray. I sprinkled them with Fleur de Sel that I mixed with some italian herbs, some finely minced garlic and placed them in a 375 degree oven to roast. I roasted them until fork tender. About 25 mins. When I took them out, I squeezed the juice of one lemon and tossed the veggies together in a bowl.


(just before going into the oven to roast)


Rustic Tomato Tart


6 Phyllo Sheets
7-8 tomatoes sliced (i like to use heirloom tomatoes when available)
1/2 cup dijon mustard or grainy mustard (whichever you prefer)
1 cup melted butter
Fontina cheese slices
Gouda cheese
or any other combination of cheese you'd prefer
1/4 tsp sea salt
1/4 tsp mixed herbs of your liking
1/2 tsp minced garlic

Dampen a cloth to have placed over top of phyllo sheets so they don't dry out
Layer one sheet of phyllo on top of a sprayed 9x13 pan, and brush with some of the melted butter leaving the excess phyllo hanging over the edge of pan
Lay the next sheet of phyllo on top
Brush a little bit of the dijon mustard on top of this phyllo sheet
Place another sheet of phyllo on top
Top this phyllo sheet with slices of gouda cheese
Begin placing sliced tomatoes over top the gouda cheese layer to create a layer of tomatoes
Sprinkle with minced garlic, half of the sea salt and herb mix
Repeat all layers exactly the same beginning with the phyllo sheet, brushed with butter and continue on from there, but change the cheese layer from gouda cheese to fontina cheese
Ending with the layer of tomatoes, sprinkled with the rest of the sea salt, garlic and herb mix
Leave the tomatoes showing on the top layer, & take the excess phyllo and bring it in just inside the pan, brushing them with melted butter
Place in a 375 degree oven for about 25-30 mins. Until edges of phyllo are brown, and cheese is melted


It is a filling tart. Can be used as an appetizer cut bite size or larger and used as a main course.
I served it along side the roasted veggies

Yummy!!!


Sorry for the pictures being so yellow. My camera is beginning to give out on me. Time for a new one.

Hope you enjoy this yummy idea for a dinner any night of the week :)

Until we cook again!


And the Winner is???

Well, I meant to post the winner of the draw yesterday, but the day just got away from me. So with no further a do...:)

Simon Dahl!!! Congratulations!!! I'll contact you to let you know personally. You are the winner of a yummy basket of preserves and canning. :) Oh, and some great recipes too.

Thanks everyone for following the blog. I am really looking forward to posting on a regular basis. So please check back often. And for those of you who didn't win this time around...don't worry, there will be plenty of other opportunities to try your luck.

Thanks for supporting Savour the Art of Food!


Thursday, November 5, 2009

Cioppino with a Carla Twist

I went to the Seafood Market today in WillowPark and walked out with so much seafood. Had to come home and make this favorite seafood stew :)


Cioppino is a fish stew derived from the various regional fish soups and stews of Italian cuisine. Cioppino is traditionally made from the catch of the day, which in the dish's place of origin is typically a combination of dungeness crab, clams, shrimp, scallops, squid, mussels and fish with fresh tomatoes in a wine sauce.


Ingredients Needed:
1 pound mussels washed
1 pound clams washed
1 pound shrimp (I used tiger prawns)
1 1/2 pounds scallops
1 1/2 pounds crab legs (I like the shells on)
3 fillets of orange roughy fish (my favorite white fish, but you can use any fish you'd like) cut in large pieces
3-4 chorizo sausage cut in large pieces
juice of one lemon
1 small shallot finely chopped
2 cloves fresh garlic finely minced
some fresh seafood herbs (I always use, dill, tarragon and cilantro)
4-5 cups fish stock
approx. 6 cups tomato based sauce
1/2 tsp. olive oil
fleur de sel or sea salt to taste (not much needed if any due to the satltyness of all the seafood)
pepper to taste

Tomato Base


Tiger Shrimp Deviened


Scallops


Orange Roughy


Mussels rinsed really well (make sure to discard any open ones at this point)


Clams rinsed really well (make sure to discard any open ones at this point)


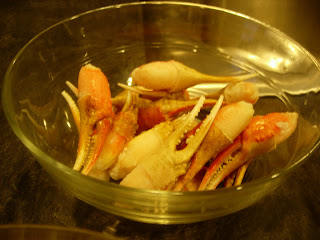
Crab Claws with shell on


Fleur de Sel (can be found in your seafood shop or specialty kitchen stores)


In a large skillet, add 1/2 tsp olive oil and saute the shallot and minced garlic

When the shallots and garlic are soft and transparent, add the chorizo sausage and cook until no longer pink. (this just helps with the cooking process once it's placed in the pot with the other ingredients which don't take long to cook)


In the meantime, place the 6 cups of tomato based sauce, along with the 4-5 cups fish stock (depending on how thick you like the soup), salt and pepper to taste in a stock pot to simmer

Add the chopped fresh herbs, excluding the cilantro and the juice of one lemon into your tomato based soup and stir


To the simmering stockpot, begin adding the ingredients depending on cooking time.
First add the sausage, shallot and garlic along with the clams and mussels. Simmer for about 5 mins.
Then add the crab and scallop and simmer for about 5 mins. Gently stir as ingredients are added so not to break up the delicate meat.
Next add the shrimp and fish (in this case Orange Roughy)
Simmer on low with lid on for approx. 10 mins. Shrimp and crab meat should be pink, & shell fish should be open. If any shell fish have not opened, discard and do not serve.


Serve in a large bowl, garnish with fresh chopped cilantro and a lemon wedge for added flavor.


Have some pieces of grainy type bread or crusty bread for dipping into the delicous tomato soup. You can't miss out on that. That's where all the flavor is!!


A great dish for any night. And it doesn't take long to make regardless of the amount of ingredients needed. The one good thing about seafood, is that it really doesn't take that long to cook. And don't worry if you don't have fresh on hand. Frozen seafood works just as well. Remember to thaw it out in the refrigerator the night before.

I know I didn't give the ingredients for the tomato base I used in this recipe. It's another of my recipes and I promise to post it tomorrow afternoon. I like to have this base for things like this. Freezes really well too :)

Until we cook again! Enjoy

Don't forget to click on the tab to the left to follow this blog for the draw. It takes place Friday of this week :)


Tuesday, November 3, 2009

Mini, Baby, Tiny, Little...it's just all so YUMMY!

Today I decided to check out our new Sobey's that opened here in our lovely community of Cranston last Thursday.

I can't tell you how excited I am to have a grocery store only 2 mins away.

As soon as I walked in the front doors, I could tell I was going to like this particular location.

As a chef I get very excited about the produce sections of all grocery stores. Especially when they offer varieties of vegetables and fruit that I could normally get from the farmer's market or my specialty grocers. Right away I noticed how beautifully displayed and well stocked the produce section was!! I knew my only 20 mins of a quick shop would quickly be turning into hours of shopping. I was right!! :)

I came across so many wonderful finds. The best part is that they are only mins away vs. a much longer drive. I spent most of my shopping time in the produce area. About 40 mins to be exact :) Silly I know...but I was like a child in a candy store. And to make it even better, the produce manager Dave noticed how excited I was at my finds, he came over to introduce himself to me and ask me...Why so excited? I told him that I was just so excited to find such specialty produce.

I decided to post about my "little" special finds and add pictures of them.


Purple Bunch Carrots
I am looking forward to adding these to the perfect autumn vegetable dish


Baby Purple Artichokes
I love these on a normal day, especially when they are at a good price. My kids love them. They have become a staple in our home.
But to find these beautiful little guys...I am now in HEAVEN!!! :)
A great appetizer to a beautiful seafood dinner.


Pomegranate Seeds
This is the time of year to purchase Pomegranates. They are awesomely priced and easily found.
I always complain at how hard it is to get these yummy tasty jewels of deliciousness out to truly enjoy. Whether in salads, desserts or even savoury dishes, they are just gorgeous.
Now...to my great JOY...you can purchase them just like this!! In a nice little container for you to enjoy without the extra work to get at them. Love it!! :)
I think these will be gracing a salad this week. Can't wait


Meyer Lemons
This is a specialty lemon. Hard to find here. It was found in China and thought to be a cross between a regular lemon and a mandarin orange. If you like lemons, but don't really care for the pucker, then these are the lemons for you. They aren't nearly as tart as a regular lemon and the peel tends to be a bit sweeter and thiner. Perfect for preserving!
Think making a beautiful sauce for a roast chicken is in order :)


Kiwi Berries
I've only ever seen these in BC. They are perfection in my eyes. Taste is much like a regular kiwi, only with the added bonus of not having to peel them because the skin is so tender. Great for topping salads, or desserts. Or just enjoying as is. They are gorgeous!!


Cape Gooseberry
I'm sure you've seen these topping some of your desserts in restaurants. I use them alot to garnish desserts and platters when I am catering. I've only ever purchased them from my specialty suppliers, so it's nice to find them in my everyday grocery store. My kids love to munch on them as a snack. I like to think of them as delicate with a sweet sour taste. Much like a cross between a regular gooseberry and a cherry tomatoe. Hard to describe the taste, so you'll just have to get some and try them for yourself. :)


Baby Zucchini and Squash
Love love love these baby veggies. The flavours don't change at all, only the size and that's what it's all about. Who wouldn't like to see these mini bites of earthiness gracing there plates whether at home or in a restaurant. Simply served...cut in half, roast and add a bit of butter and garlic. They really don't need much else.


Baby Pineapple
I just about died when I saw these. Again, I couldn't resist. Who could? Imagine it cut in half or quarters lengthwise to garnish platters mounded with beautifully colored fruit. Left whole just to admire, but I know that wouldn't last too long. It would be eaten up before you know it. Just so cute. NO ONE could resist it's cuteness!! I just know it :)


Baby Pear
So cute!! I just couldn't resist. Again, I've only seen these in farmer's markets. Never in a grocery store.
Not sure what I'll do with these other than just eat them as is. They are sweet and tender! Will end up being my mid day snack tomorrow.


Baby Eggplants
Again...I've only seen these at my farmer's markets. I have a great plan for these little babies. Cut in half, grilled whole, drizzled with a bit of olive oil and seasoned with some fleur de sel to be served a long side an herbed pork roast. YUMMY!!! I can't wait.


I hope you enjoyed my picture post of my "LITTLE" finds at my local grocery store. Make a trip to your local grocery store and see what "little" treasures await you. It just may spark some new creativity in your kitchen :)

Don't forget to click on the left tab to follow my blog! :) And just above that, click on my facebook page to follow that. That is all you have to do to be entered in my draw to celebrate the new look and direction of my company blog. A basket full of canning, preserves, & a mini recipe book that includes a couple of my not yet published recipes from my cookbook will await you if you are the winner. Leave me a comment and let me know you did it, and consider yourself in the draw:)
Easy Peesy!!!
If you don't win this time around, don't worry. There will be more draws in the future. So follow the blog to keep updated!

Tomorrow...look forward to a recipe post and picture post of my recipe for Cioppino. My favorite Seafood Soup/Stew with a twist.

In the next few days to come, my first post of TO TASTE. Where I take one ingredient, and create a dish without using a recipe. It's the easiest way to cook. No need to be scared! :)

THANKS FOR STOPPING BY!

Until we "COOK" again

Tuesday, October 27, 2009

New Look...New Ideas...New Blog!!!

First off I'd like to thank Keshia Larsen who lovingly re-did my company blog! If you have any graphic type work to be done...she's your girl!! Click her button on the left side of my blog. Urban Design Studio 1. Check her out

The purpose of my company blog is going to be changing. Or has changed should I say. Not only will my classes be added here, but I am going to focus on recipes, question and answer posts on various cooking techniques or just general questions my followers may have. More than that...I'd like to focus on teaching people how to cook without a recipe. "TO TASTE" so to speak. So on a regular basis I'll have a post called "To Taste" where I'll focus on one key ingredient and post ideas on how to cook with said ingredient "to taste" to create a spectacular dish!! You won't be disappointed.

A new look, a new direction!!! Well...all of this deserves a GIVEAWAY!!! Most of my business thrives on word of mouth. Best form of advertising. So...all you have to do to get your name down for the draw is follow my new blog and company facebook page. That's it!! Simple :)

What you may be asking is the draw for this time?? I've just finished doing a ton of canning and preserving. Something I enjoy doing at this time of year on a regular basis. So...the winner will receive a basket full of my favorite canning (salsa's, jam's, jellies, syrups, etc). Not only that, I am putting together a tiny sampling of my favorite canning recipes together for you in a cookbook, with a couple of my (not viewed, not yet published recipes from my cookbook)

Post a comment letting me know you're following. And for the few of you who already are...your names are already in for the draw. :)

Good Luck everyone!!! The draw will take place November 4th in the evening. Help me spread the word.

Wednesday, September 30, 2009

Cooking Classes

So it took me much longer than I had anticipated to put together the Fall/Winter cooking class schedule. I am running two classes a month.

I am very excited to be offering a wide variety of classes. All promise to be fun, educational, hands-on, with lots of sampling. You can't have a cooking class without sampling. This is one of the best parts.

The first Class of this Season is a Canning Class. Salsa...so yummy! So versatile. My all time favorite recipe! Not only will we prepare the salsa from scratch, can it, and take mason jars home filled with it...we will also learn a few easy, simple recipes you can use your freshly canned salsa with. Believe it or not...you can use Salsa for more than just a dip.

Take a few minutes. Head over to my website. Click on "The Class" tab, then on Calendar. That's where you'll find the class descriptions.

Remember, classes fill up quickly because each class has only a certain number of spots available.

If you are interested in any one of them, send me an email, at which point you will receive an email letting you know availability of that particular class.

To hold your spot, 30% of the class cost can be paid through PayPal.

If there are any other class ideas you'd like to pass my way, I'd love to hear them!


Wednesday, September 16, 2009

WINNER!!!!

The draw finally took place. A few days late due to some late entries. I just can't say no!

Just wanted to send a shout out to the recent winner of the FREE COOKING CLASS DRAW!
Congratulations Susie Tilleman!!!

Sorry, there could only be one winner. Don't worry, there will be more opportunities to win. Follow this blog to stay in the loop.


Wednesday, September 2, 2009

GIVEAWAY!!!!!

Now that summer is over and the routines of daily life are back in full swing, I thought I'd start the new season for Savour the Art of Food with a Draw!!

What do you have to do to be put in the draw you may be wondering? Well...wonder no more!
Here are the dets!

  1. Steal a copy of my Savour the Art of Food button from the sidebar. Copy and Paste it to your blog
  2. Give Savour a little shout out on said blog: eg; write how awesome this company is...LOL's. (joking) really, just mention Savour the Art of Food Company on your blog and if you know what we are all about, then mentioning that is a bonus too!
  3. If you ALSO post a link on your facebook page...well...that qualifies you for not just one entry for your name BUT TWO (2) ENTRIES. (better chance of winning)
  4. Follow my company on Twitter, actual Savour blog, or my facebook page for Savour and...you guessed it!!! That gives you THREE (3) entries!!!
  5. Comment on this blog by leaving me your email address, let me know what you are doing, that way I can contact you if you are the WINNER
What are we drawing for??? .......drum roll please! :)
A FREE
YES FREE COOKING CLASS OF YOUR CHOICE!!

There can only be 1 winner. Sorry :)

When does the draw take place?
FRIDAY, SEPTEMBER 11th, 2009 at approx. 11AM!!

SPREAD THE WORD!!!

disclaimer: you must live in calgary to qualify for this draw


Wednesday, August 12, 2009

Mod Events and Co...Happy Birthday!!!

IT'S OFFICIAL!!! Today is born a collaboration between 4 very talented WOMEN!!!


Bree Johnson: The Event Planner


Vanessa Ross: The Photographer


Keshia Larsen: The Graphic Designer


And Me, Carla McDaniel: The Caterer


We began our collaboration months ago. A couple of us had had the brilliant idea of forming an alliance (so to speak) of a few women who are trying to start up a business in the same field. Well...one conversation led to another, phone calls were made, and a first time meeting was set up. Not knowing how this would all come together or play out, all four of us got together and shared our ideas and visions for our own companies. We soon found out they were very similar. One thing led to another, and before we knew it, the excitement, ideas, and visions began to unfold. After months of planning...here we are! :)
  • We have a facebook page...


Join our Facebook page, follow us on Twitter, check out our Blog and our Website.

We are truly excited about setting off on our new Adventure Together!

Look for us at the Bridal Expo September 24th. Our big DEBUT!!!!


Savour the Art of Food will also continue with cooking classes, and catering as it's own identity.
Anything related to Mod, will be posted on the official Mod website, Facebook page, and Blog.